
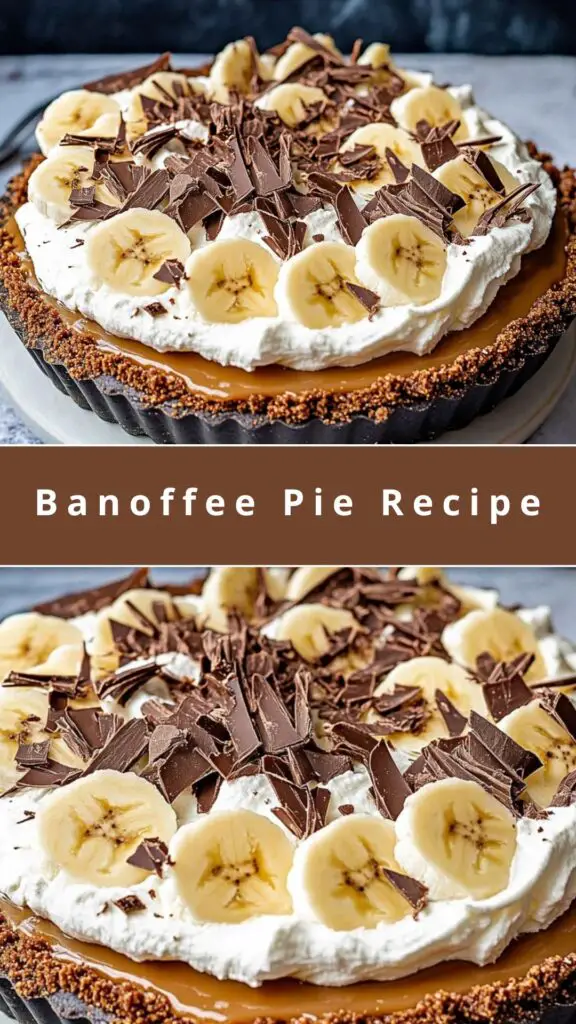
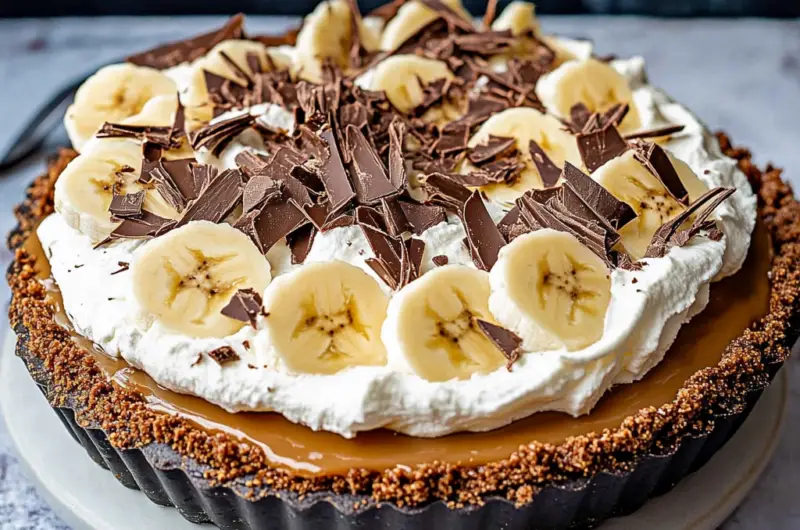
Looking for a mouthwatering dessert? Try this easy Banoffee Pie recipe – a no-bake treat made with a delicious chocolate crust, creamy dulce de leche, fresh banana slices, and whipped heavy cream. This easy dessert recipe is perfect for any occasion, from family dinners to special celebrations. With its layers of rich caramel, creamy banana, and chocolate, this banoffee pie will quickly become a favorite. Make it ahead for stress-free entertaining or serve it fresh for a delicious indulgence.
Ingredients:
- 3 cups chocolate wafers or chocolate-covered digestive biscuits
- 1/2 cup unsalted butter, melted
- 1 cup dulce de leche or caramel sauce
- 2 bananas, sliced
- 1 1/2 cups heavy whipping cream, chilled
- 1/4 cup powdered sugar (confectioners sugar)
- 1 tsp vanilla extract
- 2 oz chocolate (chips or chunks)
Instructions:
- Prepare the Crust: Grease an 8-inch tart or pie dish with butter. Set aside. Crush the chocolate wafers or cookies in a food processor until they become fine crumbs. Alternatively, place the cookies in a ziplock bag and crush them with a rolling pin.
- Combine Butter and Cookie Crumbs: Melt the butter and stir it into the crushed cookies until well combined. Press this mixture evenly into the prepared pie dish, ensuring it reaches the edges. The crust should be about 1/4 inch thick. Refrigerate the crust for at least 4 hours to set.
- Make the Chocolate Curls: Melt the chocolate using a double boiler or microwave. Once melted, spread the chocolate in a thin layer on a baking sheet and refrigerate for 1 hour. After it’s set, use a knife to scrape across the surface of the chocolate to create curls. Store these in the fridge until needed.
- Assemble the Pie: Once the crust is set, pour the dulce de leche (or caramel sauce) over the crust, smoothing it into an even layer with an offset spatula. Arrange the banana slices on top of the toffee layer.
- Whip the Cream: In a chilled mixing bowl, whip the heavy cream, powdered sugar, and vanilla extract until soft peaks form. Spoon the whipped cream over the bananas, creating swirls with the back of a spoon.
- Top with Chocolate Curls: Finish the pie by garnishing with the chocolate curls. Chill the pie in the fridge for at least 2 hours before serving, allowing the layers to set and the flavors to meld.
Tips:
- Make Ahead: This pie can be made a day in advance. Simply refrigerate overnight to allow the layers to firm up and the flavors to deepen.
- Texture Tip: For extra crunch in the crust, lightly toast the cookie crumbs before mixing with butter.
- Whipped Cream: Be sure to use chilled cream for easier whipping and a fluffier result.
Variations and Substitutions:
- Caramel: If you prefer a more traditional flavor, use store-bought or homemade caramel instead of dulce de leche.
- Bananas: Swap bananas for another fruit like strawberries or raspberries for a twist.
- Crust: Use graham crackers or Oreo cookies instead of chocolate wafers for a different base.
- Vegan Option: Replace the heavy cream with coconut cream and use a dairy-free butter alternative to make the pie vegan.
FAQs:
Can I freeze Banoffee Pie?
Yes, you can freeze the pie! Wrap it tightly and store it in the freezer for up to a month. Let it thaw in the fridge for a few hours before serving.
Can I make the pie without whipped cream?
While the whipped cream adds a delicious lightness to the pie, you could use a whipped coconut cream or a non-dairy alternative if you prefer.
How long can I store the pie in the fridge?
Banoffee pie can be stored in the fridge for up to 3 days. However, it’s best eaten within 2 days for the freshest taste and texture.
Serving Suggestions:
- Pair with Coffee or Tea: Banoffee pie is the perfect dessert to serve with a cup of coffee or tea after a meal.
- Add a Dusting of Cocoa Powder: For a richer flavor, sprinkle a bit of cocoa powder or cinnamon on top of the whipped cream.
- Serve with Ice Cream: A scoop of vanilla ice cream on the side would complement the flavors beautifully.
Why You’ll Love This Recipe:
Banoffee pie is the perfect blend of rich toffee, creamy bananas, and velvety whipped cream, all encased in a crunchy chocolate crust. It’s incredibly indulgent yet easy to make, making it the ideal dessert for any occasion. The combination of textures and flavors will leave everyone coming back for more!
Banoffee Pie Recipe
8
servings30
minutes4
hoursIngredients
-
3 cups chocolate wafers or chocolate-covered digestive biscuits
-
1/2 cup unsalted butter, melted
-
1 cup dulce de leche or caramel sauce
-
2 bananas, sliced
-
1 1/2 cups heavy whipping cream, chilled
-
1/4 cup powdered sugar (confectioners sugar)
-
1 tsp vanilla extract
-
2 oz chocolate (chips or chunks)
Directions
- Prepare the Crust: Grease an 8-inch tart or pie dish with butter. Set aside. Crush the chocolate wafers or cookies in a food processor until they become fine crumbs. Alternatively, place the cookies in a ziplock bag and crush them with a rolling pin.
- Combine Butter and Cookie Crumbs: Melt the butter and stir it into the crushed cookies until well combined. Press this mixture evenly into the prepared pie dish, ensuring it reaches the edges. The crust should be about 1/4 inch thick. Refrigerate the crust for at least 4 hours to set.
- Make the Chocolate Curls: Melt the chocolate using a double boiler or microwave. Once melted, spread the chocolate in a thin layer on a baking sheet and refrigerate for 1 hour. After it’s set, use a knife to scrape across the surface of the chocolate to create curls. Store these in the fridge until needed.
- Assemble the Pie: Once the crust is set, pour the dulce de leche (or caramel sauce) over the crust, smoothing it into an even layer with an offset spatula. Arrange the banana slices on top of the toffee layer.
- Whip the Cream: In a chilled mixing bowl, whip the heavy cream, powdered sugar, and vanilla extract until soft peaks form. Spoon the whipped cream over the bananas, creating swirls with the back of a spoon.
- Top with Chocolate Curls: Finish the pie by garnishing with the chocolate curls. Chill the pie in the fridge for at least 2 hours before serving, allowing the layers to set and the flavors to meld.


Leave a Reply