
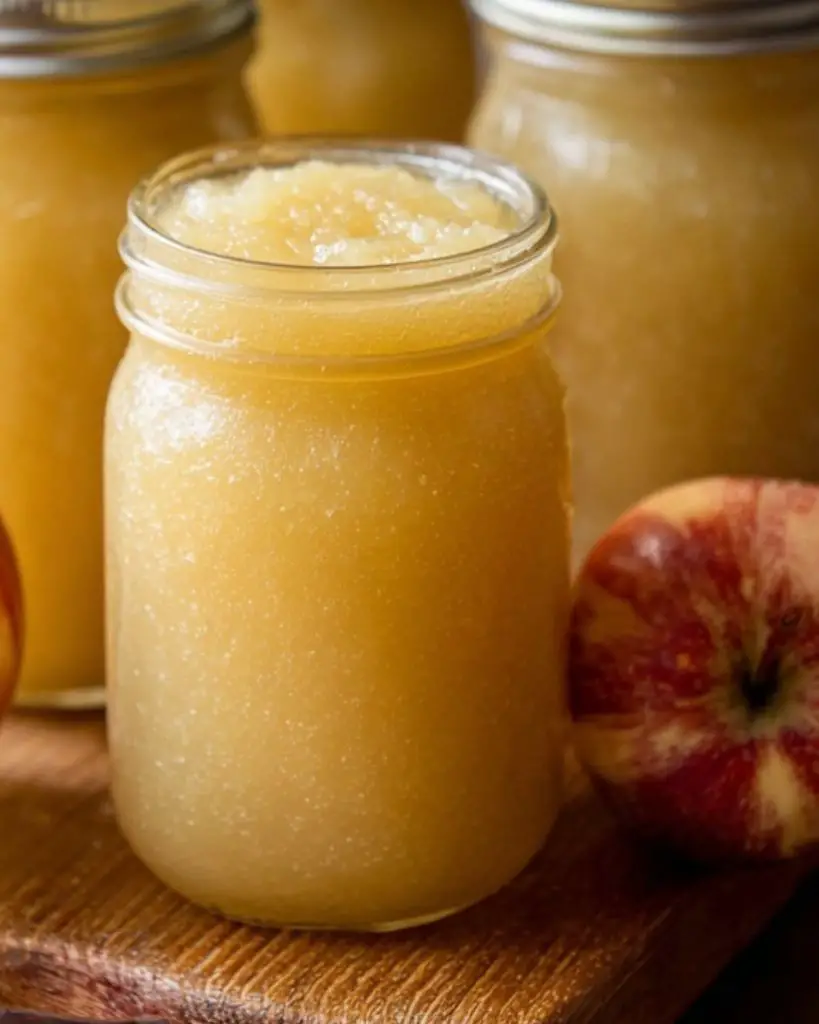
Make homemade canned applesauce easily with fresh apples and simple ingredients. This step-by-step recipe shows how to cook, mash, and preserve applesauce safely using a water bath canner. Perfect for long-term storage, baking, or a healthy snack all year round.
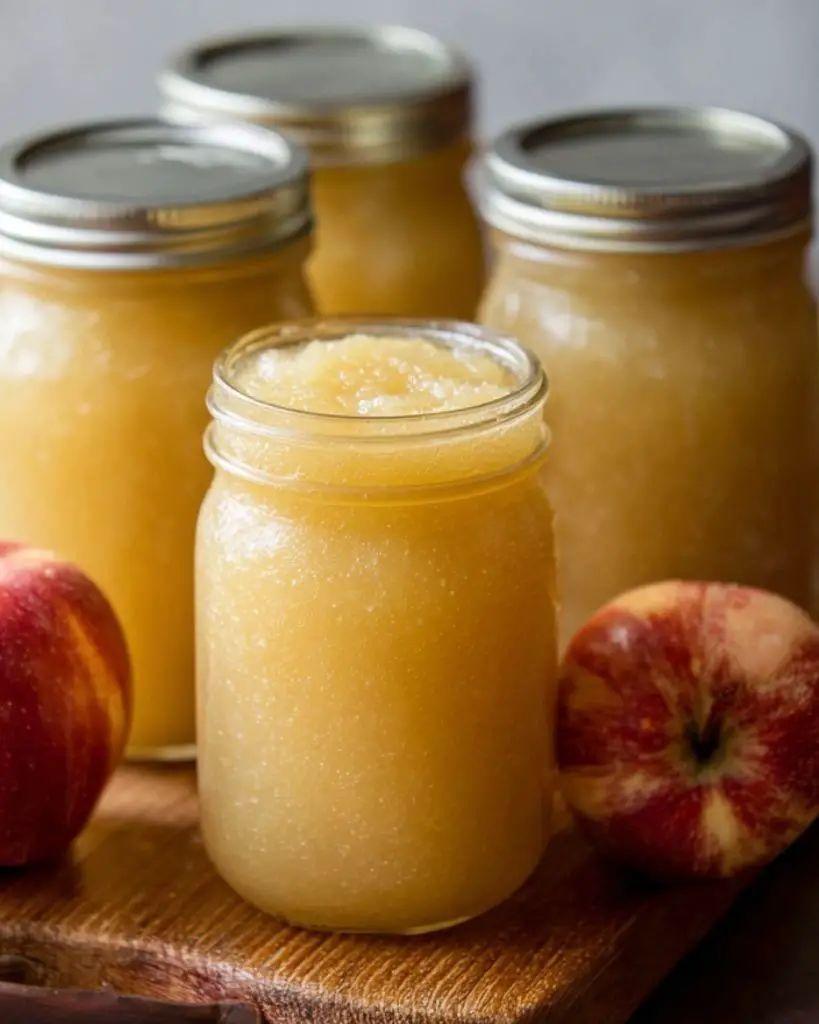
This easy homemade canned applesauce recipe lets you preserve the taste of fresh apples all year long. It’s simple, wholesome, and perfect for snacks, baking, or as a side dish to savory meals.
Ingredients
- 21 lbs fresh apples (any variety – Golden Delicious works beautifully)
- 2–3 cups water, more if needed
- Granulated sugar, optional (to taste)
Instructions
1. Prepare the Canning Equipment:
Ensure all jars, lids, and rings are sterilized. Run them through the dishwasher or boil them briefly before use. Always use new lids to ensure a proper seal. Clean your workspace and have all tools ready.
2. Prepare the Apples:
Wash the apples thoroughly.
- If using an apple sauce maker: leave the peels and cores on, then cut the apples in halves or quarters.
- If mashing by hand: peel and core the apples before cutting.
Place the apples in a large pot with 2–3 cups of water. Cover and cook over medium heat, stirring occasionally, until the apples are soft and tender. Add more water as needed to prevent burning.
3. Mash or Puree:
Run the softened apples through a food mill or applesauce maker to remove skins and cores, or mash by hand for a chunkier texture. Adjust the consistency with a bit of extra water if necessary—remember, the sauce will thicken as it cools.
4. Sweeten (Optional):
If desired, stir in sugar to taste. Start with ¼ cup and adjust as needed, depending on the sweetness of your apples. Keep in mind that the flavor will deepen and sweeten slightly after canning.
5. Fill the Jars:
Use a funnel to fill hot, sterilized jars with applesauce, leaving ½ inch of headspace. Remove air bubbles with a small spatula, wipe the rims clean, and seal with new lids and rings.
6. Process the Jars:
Place the jars in a water bath or steam canner. Add 1 tablespoon of white vinegar to the water if you have hard water.
Processing Times:
- 0–1,000 ft: Pints – 15 min | Quarts – 20 min
- 1,001–3,000 ft: Pints – 20 min | Quarts – 25 min
- 3,001–6,000 ft: Pints – 20 min | Quarts – 30 min
- Above 6,000 ft: Pints – 25 min | Quarts – 35 min
Let jars cool undisturbed for 12–24 hours. Check seals, then store in a cool, dark place for up to one year.
Tips
- Use a mix of sweet and tart apples for balanced flavor.
- Keep an eye on the water level while cooking to prevent scorching.
- Always use clean, sterilized equipment to avoid contamination.
- Warm jars before filling to prevent cracking when adding hot applesauce.
Variations and Substitutions
- Unsweetened Applesauce: Skip the sugar entirely for a naturally sweet result.
- Spiced Applesauce: Add cinnamon, nutmeg, or cloves for extra warmth.
- Mixed Fruit Applesauce: Blend in pears, peaches, or berries for a unique twist.
- Chunky Style: Lightly mash instead of pureeing for a rustic texture.
FAQs
Can I use any type of apple?
Yes, most varieties work well. Golden Delicious, Fuji, Honeycrisp, or McIntosh are excellent options.
Do I have to peel the apples?
Not if you’re using an apple mill—otherwise, peel them for smoother results.
How long does canned applesauce last?
Up to one year when stored in a cool, dark place with properly sealed lids.
Can I freeze applesauce instead of canning?
Absolutely. Store cooled applesauce in freezer-safe containers for up to 6 months.
Serving Suggestions
- Serve warm over pork chops or roast chicken.
- Stir into oatmeal or yogurt.
- Use as a natural sweetener in baking.
- Enjoy it chilled as a healthy snack.
Why You’ll Love This Recipe
This canned applesauce captures the essence of autumn in every jar. It’s simple to make, naturally delicious, and free from preservatives. Perfect for families, gifting, or stocking your pantry for the year ahead.

Homemade Canned Applesauce
6
servings15
minutes20
minutesIngredients
-
21 lbs fresh apples (any variety – Golden Delicious works beautifully)
-
2–3 cups water, more if needed
-
Granulated sugar, optional (to taste)
Directions
- Ensure all jars, lids, and rings are sterilized. Run them through the dishwasher or boil them briefly before use. Always use new lids to ensure a proper seal. Clean your workspace and have all tools ready.
- Prepare the Apples:
- Wash the apples thoroughly.
- If using an apple sauce maker: leave the peels and cores on, then cut the apples in halves or quarters.
- If mashing by hand: peel and core the apples before cutting.
- Place the apples in a large pot with 2–3 cups of water. Cover and cook over medium heat, stirring occasionally, until the apples are soft and tender. Add more water as needed to prevent burning.
- Mash or Puree:
- Run the softened apples through a food mill or applesauce maker to remove skins and cores, or mash by hand for a chunkier texture. Adjust the consistency with a bit of extra water if necessary—remember, the sauce will thicken as it cools.
- Sweeten (Optional):
- If desired, stir in sugar to taste. Start with ¼ cup and adjust as needed, depending on the sweetness of your apples. Keep in mind that the flavor will deepen and sweeten slightly after canning.
- Fill the Jars:
- Use a funnel to fill hot, sterilized jars with applesauce, leaving ½ inch of headspace. Remove air bubbles with a small spatula, wipe the rims clean, and seal with new lids and rings.
- Process the Jars:
- Place the jars in a water bath or steam canner. Add 1 tablespoon of white vinegar to the water if you have hard water.
- Processing Times:
- –1,000 ft: Pints – 15 min | Quarts – 20 min
- ,001–3,000 ft: Pints – 20 min | Quarts – 25 min
- ,001–6,000 ft: Pints – 20 min | Quarts – 30 min
- Above 6,000 ft: Pints – 25 min | Quarts – 35 min
- Let jars cool undisturbed for 12–24 hours. Check seals, then store in a cool, dark place for up to one year.


Leave a Reply