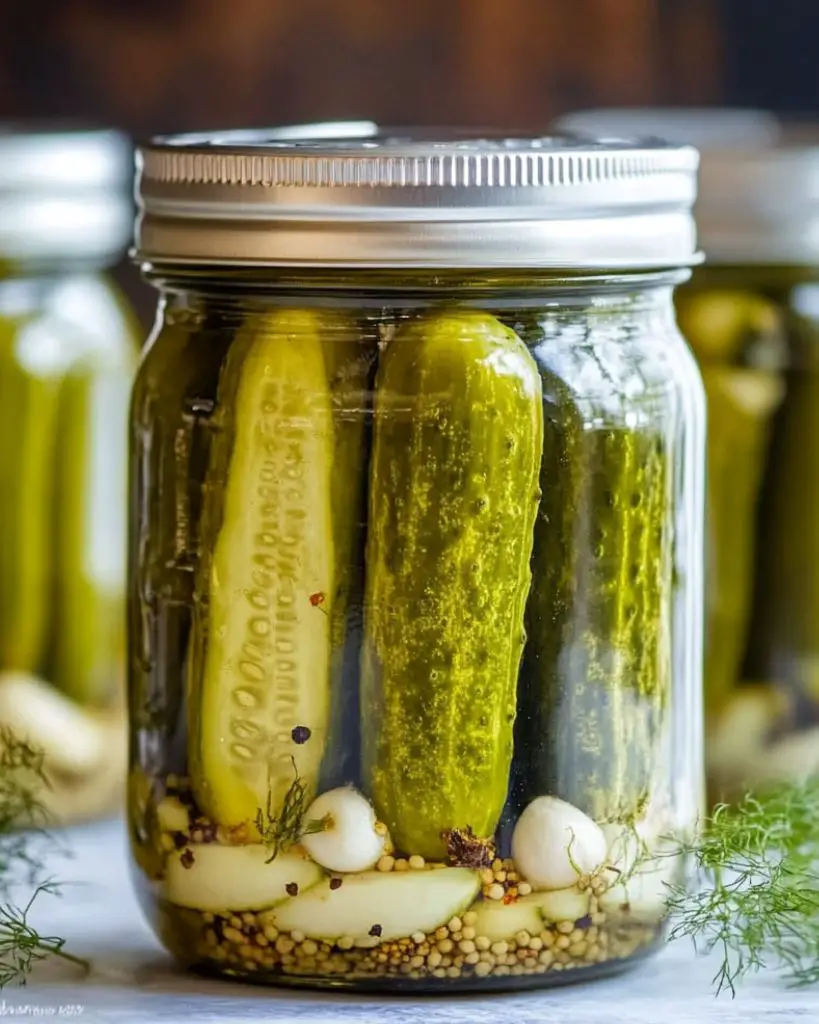
Homemade Canned Dill Pickles are the perfect way to preserve crisp, tangy cucumbers with a flavorful garlic and dill brine. This easy pickling recipe uses simple ingredients like fresh cucumbers, vinegar, and pickling salt to create crunchy pickles that last up to a year. Whether you love classic dill pickles, spicy pickles, or garlic-infused pickles, this beginner-friendly canning method ensures a delicious, homemade taste with no preservatives. Enjoy these homemade pickles with sandwiches, burgers, charcuterie boards, or as a healthy snack!
Ingredients
For Canned Cucumbers:
- 6 bay leaves (1 per jar)
- 1/2 Tbsp peppercorns (5 per jar)
- 6 dill stems with flowers, cut into 3″ pieces (1 full stem per jar)
- 12 garlic cloves, halved (2 cloves per jar)
- 2-inch horseradish root, chopped and divided (optional, but adds great flavor)
- 6 lbs small cucumbers, well rinsed with ends trimmed
For Pickling Brine:
- 8 cups water
- 1/3 cup granulated sugar
- 6 Tbsp pickling salt (or 1/3 cup)
- 6 cups distilled white vinegar (5% acidity)
Tools Needed for Canning:
- 6 quart-sized wide-mouth mason jars with rings and new lids
- 1 large stockpot (20Qt+) with rack (or a canner)
- 1 jar lifter for safe handling
Instructions
Sterilizing Canning Jars and Lids:
- Wash jars and lids thoroughly with soap and warm water.
- Place jars and lids in a large pot of water, bring to a boil, then reduce heat, cover, and simmer for 10 minutes.
- Carefully drain the water and set jars aside, ready for use.
Making Homemade Pickles:
- Divide bay leaves, peppercorns, dill stems, garlic, and horseradish (if using) among the bottoms of 6 quart-sized jars.
- Pack cucumbers tightly into the jars.
- In a medium pot, combine water, sugar, salt, and vinegar. Bring the pickling brine to a boil.
- Pour the hot brine over the cucumbers, leaving 1/2 inch of space at the top of each jar.
- Secure lids onto jars, tightening just enough to hold the seal but not too tight to prevent air bubbles from escaping.
- Place jars into a canner or a large stockpot lined with a wire rack. Fill the pot with boiling water until jars are covered by 1-2 inches of water.
- Process (boil) for 15 minutes.
- Using a jar lifter, carefully remove jars from the water and let them sit undisturbed at room temperature for 12-24 hours.
- After 24 hours, check the seals by pressing the center of each lid—if it doesn’t move, the jar is properly sealed. If a jar doesn’t seal, store it in the refrigerator and enjoy within 3 months.
Tips
- Use fresh, firm cucumbers for the crispiest pickles.
- Trim the ends of cucumbers to prevent them from softening.
- Avoid over-tightening lids so air bubbles can escape during processing.
- Let pickles rest for at least a week before eating to develop full flavor.
- Store sealed jars in a cool, dark place for up to 1 year.

Variations and Substitutions
- Spicy Pickles: Add red pepper flakes or sliced jalapeños for heat.
- Sweeter Pickles: Increase sugar to 1/2 cup for a touch of sweetness.
- Garlic Lovers: Add extra garlic cloves for bolder flavor.
- Dill-Free: If you’re out of fresh dill, use 1 tsp dried dill per jar.
FAQs
Can I use apple cider vinegar instead of white vinegar?
Yes, but it will slightly alter the flavor. Ensure it has 5% acidity.
How long do homemade pickles last?
Properly sealed pickles last up to 1 year in a cool, dark place. Once opened, refrigerate and consume within 3 months.
Why are my pickles soft instead of crispy?
Soft pickles may result from overripe cucumbers or improper processing. Use firm cucumbers and avoid over-boiling.
Serving Suggestions
- Enjoy with sandwiches and burgers for extra crunch.
- Chop into salads or potato dishes for a tangy kick.
- Serve as a side for barbecue or grilled meats.
- Dice and add to deviled eggs or tuna salad for extra flavor.
- Snack on them straight from the jar!
Why You’ll Love This Recipe
- Crispy and flavorful – perfect homemade pickles every time.
- No preservatives – made with simple, natural ingredients.
- Customizable – adjust flavors to your preference.
- Long shelf life – store for up to a year.
- Great for beginners – easy canning instructions included!
Making your own homemade canned dill pickles is easier than you think! With just a few simple steps, you’ll have crisp, tangy pickles to enjoy year-round.

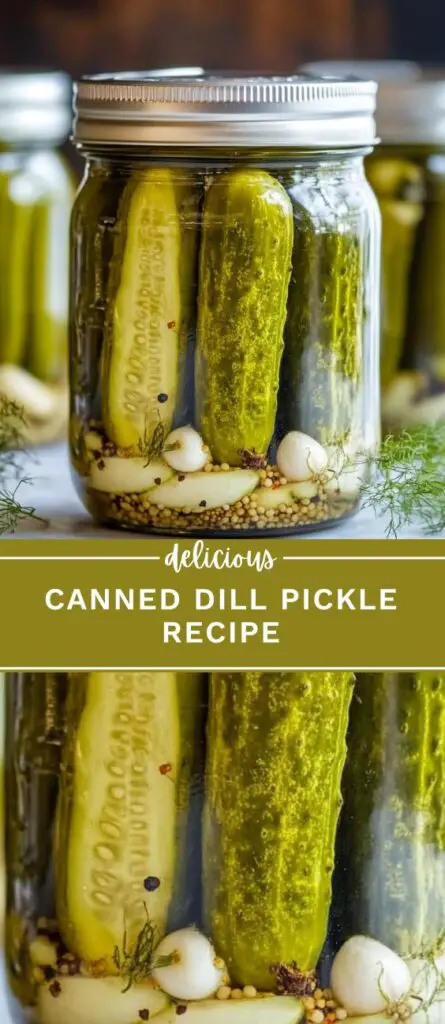
Canned Dill Pickle Recipe
30
servings1
hour15
minutesIngredients
For Canned Cucumbers:
6 bay leaves (1 per jar)
1/2 Tbsp peppercorns (5 per jar)
6 dill stems with flowers, cut into 3″ pieces (1 full stem per jar)
12 garlic cloves, halved (2 cloves per jar)
2-inch horseradish root, chopped and divided (optional, but adds great flavor)
6 lbs small cucumbers, well rinsed with ends trimmed
For Pickling Brine:
8 cups water
1/3 cup granulated sugar
6 Tbsp pickling salt (or 1/3 cup)
6 cups distilled white vinegar (5% acidity)
Tools Needed for Canning:
6 quart-sized wide-mouth mason jars with rings and new lids
1 large stockpot (20Qt+) with rack (or a canner)
1 jar lifter for safe handling
Directions
- Sterilizing Canning Jars and Lids:
- Wash jars and lids thoroughly with soap and warm water.
- Place jars and lids in a large pot of water, bring to a boil, then reduce heat, cover, and simmer for 10 minutes.
- Carefully drain the water and set jars aside, ready for use.
- Making Homemade Pickles:
- Divide bay leaves, peppercorns, dill stems, garlic, and horseradish (if using) among the bottoms of 6 quart-sized jars.
- Pack cucumbers tightly into the jars.
- In a medium pot, combine water, sugar, salt, and vinegar. Bring the pickling brine to a boil.
- Pour the hot brine over the cucumbers, leaving 1/2 inch of space at the top of each jar.
- Secure lids onto jars, tightening just enough to hold the seal but not too tight to prevent air bubbles from escaping.
- Place jars into a canner or a large stockpot lined with a wire rack. Fill the pot with boiling water until jars are covered by 1-2 inches of water.
- Process (boil) for 15 minutes.
- Using a jar lifter, carefully remove jars from the water and let them sit undisturbed at room temperature for 12-24 hours.
- After 24 hours, check the seals by pressing the center of each lid—if it doesn’t move, the jar is properly sealed. If a jar doesn’t seal, store it in the refrigerator and enjoy within 3 months.

Leave a Comment